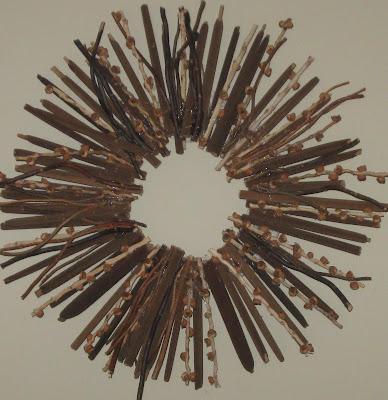
handmade: an easy wreath
Well, you should know by now that this isn't a "how to" blog!
I'm not the best about documenting my creation steps via camera.
I'm currently in the mood to only have things in our home that we use. If it's not in use, or doesn't serve an eventual, seasonal purpose (Christmas decorations, swim gear, camping supplies, etc.) then it just might be discarded (if deemed junk), or given away (if deemed worthy). This philosophy applies to the "stuff' which I am responsible for. You won't find me tossing at random items in the barn or tool/building area in the basement. My husband and I at times have different definitions of the terms "trash" and "treasure!"
I was sorting through a decorating box and found some dried naturals I'd purchased a while back and put in a large crock for decorating. I loved the look at the time, but just don't need that decoration anymore. Each of the pieces were about 2-3 feet long. Since brown is a favorite color I didn't just want to toss these items, so I came up with the vision of a wreath.
I didn't want to purchase anything, so scrounging around the house I found copper wire that I formed into a circle (1 inch width all around). I then wrapped the wire in burlap (I'm almost out!). This became my backing to which I hot glued my pieces. I cut the dried natural pieces down to 2 inch sections and glued. I made a loop out of twine by which the wreath hangs on the wall.
Like I said...easy!
It seems I've been having many handmade posts. Although not a goal for 2012 it seems hand making items is becoming more and more of a hobby for my husband and myself. Our daughter's wall book bin is almost complete, and then we have a vision for a bench in our garage (Similar to the idea of a mudroom bench, but we'll call it a garage bench since it serves as our mudroom too!)
What have you handmade lately?

Comments